CONSTRUCTING THE NEPAL FLAG
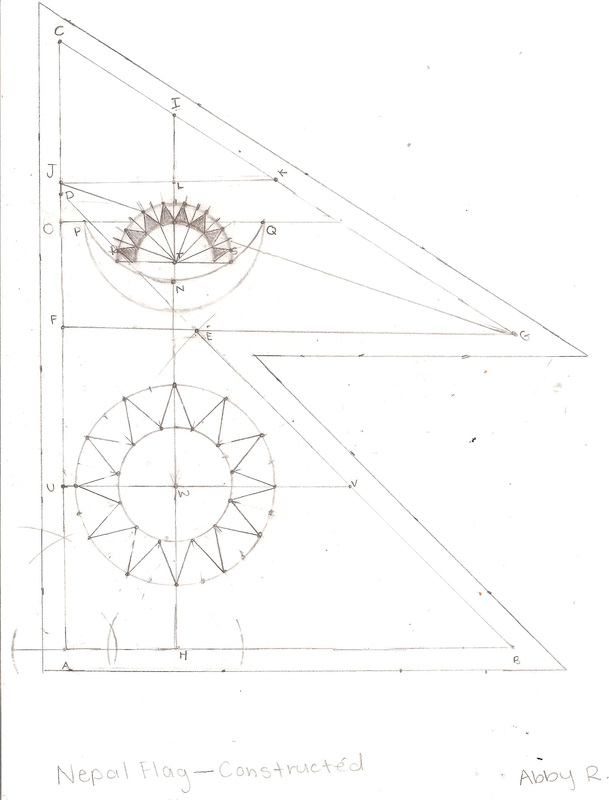
For this project, the objective was to construct the Nepal flag with just a compass, protractor, and a ruler. We created parallel and perpendicular lines, equilateral triangles, circles, angles, etc. The first step was to construct the outside of the flag, we made a line and two angles that created the odd shape of the Nepal flag by constructing perpendicular and parallel lines. When we constructed the moon and the sun, we constructed equilateral triangles and a crescent. For the equilateral triangles on the moon, we created a double half circle that was a certain length and from the middle of the circle, we created four triangles on each side of the half circle. For the sun, we needed a whole circle instead of a half and we needed twelve triangles instead of eight. When we made the crescent in the moon, we drew two lines that were a certain length that was below the eight equilateral triangles. Finally, when we finished that, we created a border that was a certain length which went all around the outside.
CONSTRUCTED FLAG
|
OUTLINED CONSTRUCTED FLAG
|
COLORED CONSTRUCTED FLAG
|
|
When we constructed this flag, we used the compass to construct parallel lines, perpendicular lines, and circles. We also used rulers to make lines through the arcs we constructed with the compass and we used the protractor to make the triangles. During the process of constructing this flag, something that I found most challenging was when I couldn't align the moon to be in the right place, it would always be too close to the edge, not centered, etc.
|
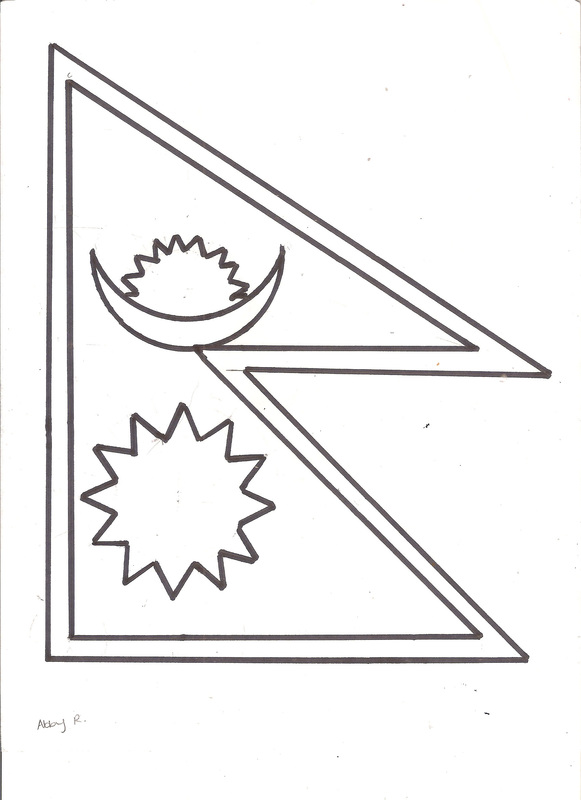
Once I finished my constructed flag, I constructed a new one that I could outline without having all of the pencil marks. When I constructed it again, I found it to be a lot easier since I had already made one and knew what I had trouble with. After I constructed the flag with a pencil, I outlined the actual flag in sharpie and erased the left over pencil marks that were mostly arcs, angles, and lines.
|
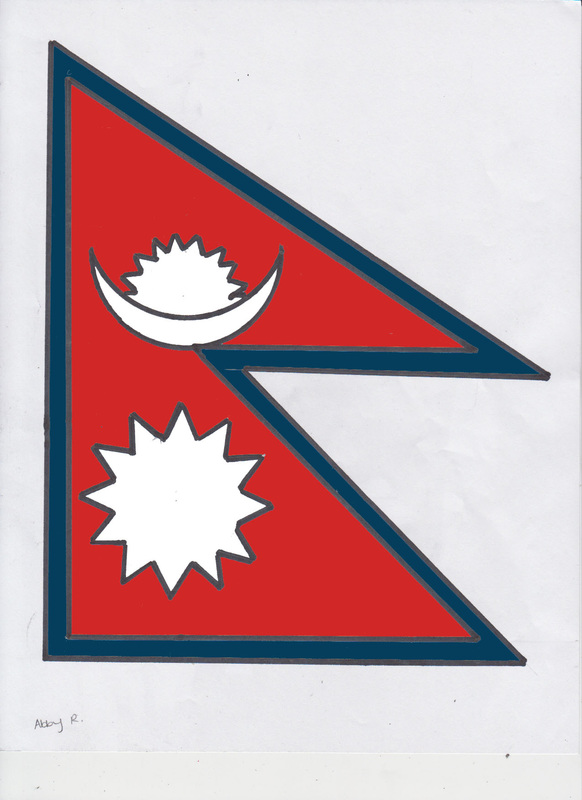
The final product is an outline of my constructed flag with specific colors in specific places, a white sun and moon, red inside, and blue outlineI colored this in photoshop using a scanned version of my outline. While working on this project I learned how to construct parallel lines, perpendicular lines, circles, triangles, angles, and much more using only a compass and a ruler. When I finished coloring and outlining the flag, I thought that the flag turned out a lot nicer than I originally thought. At first, I thought I would have to start over because there were some parts that weren't even or didn't look right, but I eventually fixed my mistakes and it turned out nicer than I expected.
|
CODED INITIALS
The objective for this project was to code a robot in ChIDE to draw our initials. The entire code consisted of many different commands that were used to control the robot and the ones we used the most were robot.setSpeed (speed,radius), robot.driveAngle (input any number), robot.turnLeft (angle, radius, track width), and robot.turnRight (angle, radius, track width). The command robot.driveAngle (input any number) tells the robot how far to move based on the number of degrees you enter which rotates the wheels that same degree. The next two commands, robot.turnLeft (angle, radius, track width) and robot.turnRight (angle, radius, track width) tells the robot to either turn right or left at any degree you choose. For example. if you were to enter robot.turnLeft (90, 1.75, 3.69) the robot would turn left 90 degrees exactly.
MY CODED SQUARE
|
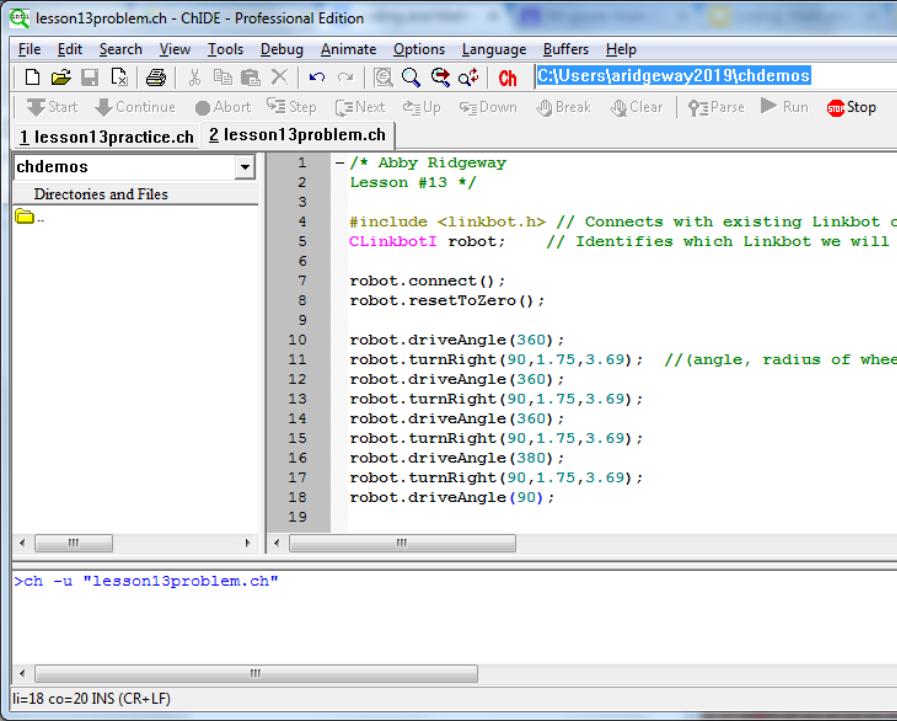
THE CODE FOR MY SQUARE
|
|
VIDEO OF MY CODED INITIALS
Something that was most challenging was when I would want the robot to move over a line in and exact spot because it would never perfectly go over the line. Even though it wouldn't trace perfectly, I still managed to make it as close as I could to perfect because I persevered and kept trying. Once I finished this project I felt very proud of how the initials turned out because I kept telling myself that it was going to turn out horrible. In the end, I learned that coding can look intimidating and hard to understand when you first see it, but once you learn it's not as difficult as it seems and easy to catch on to.
|
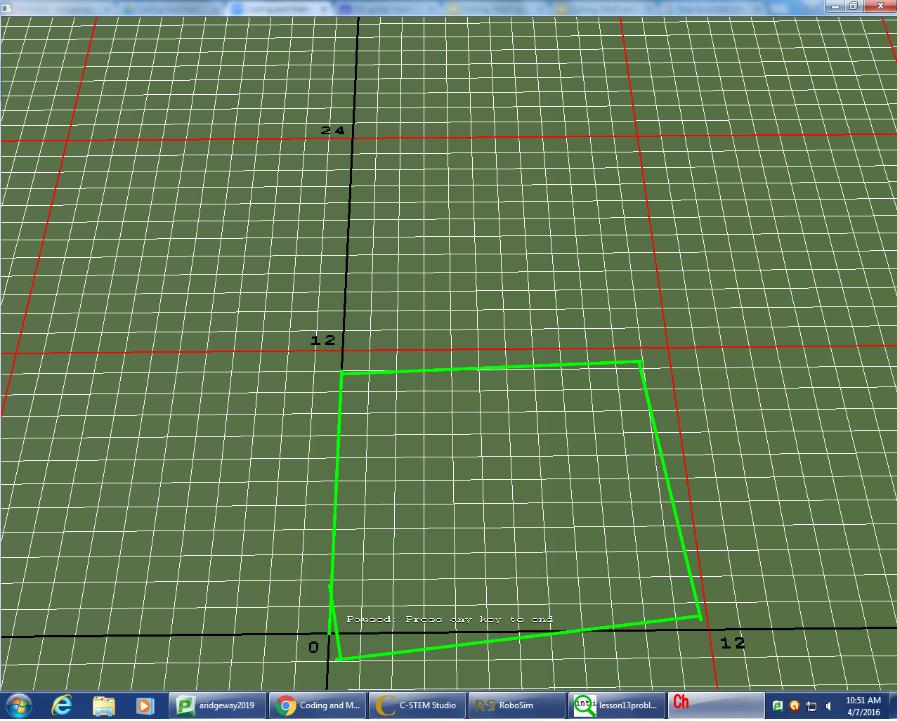
This was the first code we wrote that involved the robots and our task was to create a closed shape ( mine was a square ) and none of us really knew what we were doing because we had never coded a robot to move before. Since this was on the easier side, the code we wrote wasn't that complicated or long, it only had nine lines which is nothing compared to the thirty four line code we wrote for our initials. This code helped us get familiar with coding a robot and seeing how it reacted to our commands.
|
